Making wire coils. Tutorials for beginners.
Making wire coils. Wire Wrapping – twisted coils tutorials for beginners. Coiling gizmo. Wire wrapped jewelry. Valeriy Vorobev.
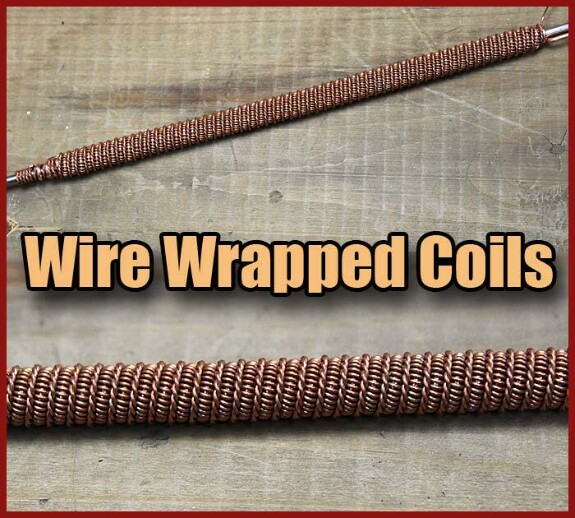
To create wire and stone jewelry, I often use wire coils. Wire coils perfectly complement jewelry with stones and give them a fantastic look. Today we will make three wire coils from copper wire together with you.
Wire for Wire Coils
I like to work with 1mm thick wire (18 ga) and 0.4mm thick wire (26 ga). I use thick wire for the base and thin wire for the weaving. You can pick any material you want. But I prefer to use copper wire. It is not expensive and the stiffness is appropriate. If you are just starting out with the wire, I would advise you to choose copper wire for your jewelry.
Today we are going to make wire coils. Have you ever heard of them? Maybe some of you have already used them in your work?
Tools for creating wire coils.
I already told you about Coiling Gizmo in my previous lessons. Check it out if you haven’t yet. Back then, we made short wire coils for jewelry and used different tools for it.
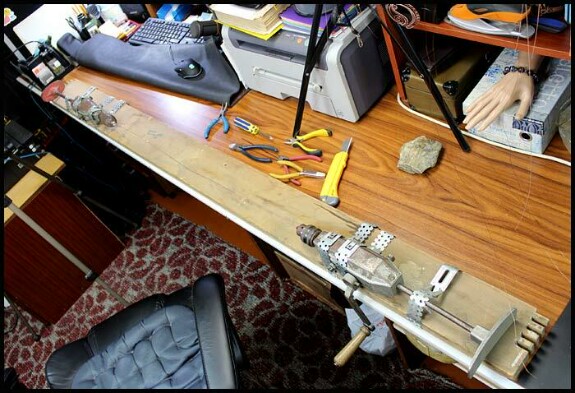
This time, to make long coils out of copper wire, we will need additional tools. We can’t use the same tools we used to make Wire Gizmo. Look at the photo below as an example. This is the tool I’m talking about.
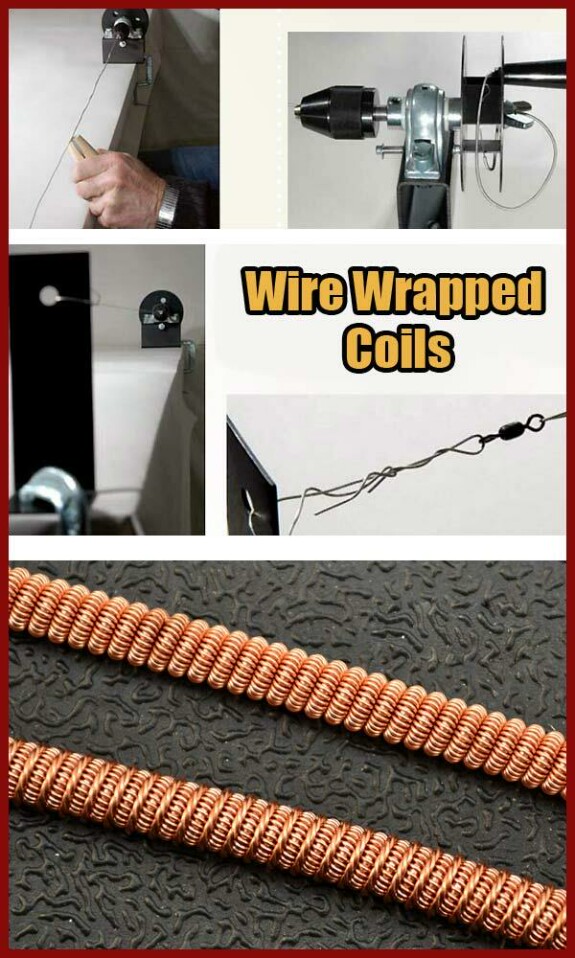
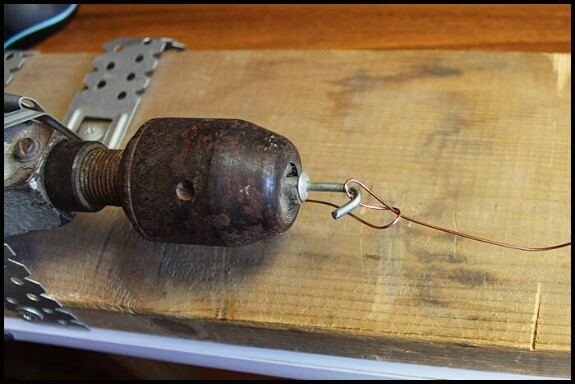
I could not find and buy such a tool in any store. All my searches failed hopelessly. So, I made it myself. I used spade handle drills. I fastened them firmly to the board. They should be on opposite sides of the board and facing each other. The space between them should be about 80 cm. This is not difficult at all and you can easily make something like this.
On the left side instead of the drill, you can attach a free spinning carabiner as in the photo above. The tool may seem clumsy, but it is really effective.
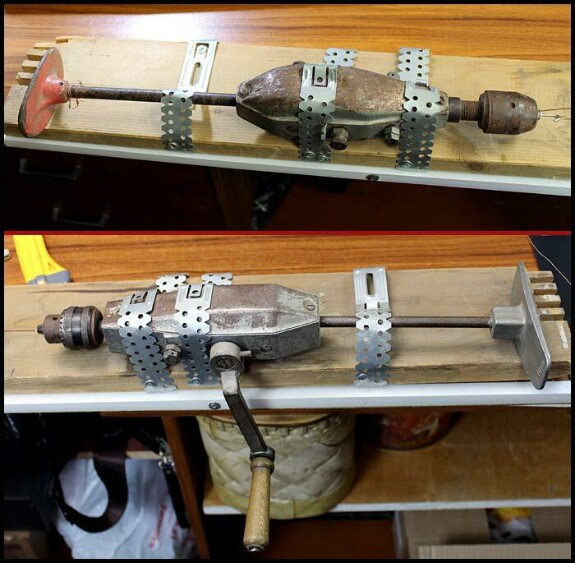
This device is very convenient to use. When I need it, I just take a board and attach it to the table with a self-tapping screw or clamp. All ingenious is simple, and all simple is brilliant.
Lesson – The First Wire Coil.
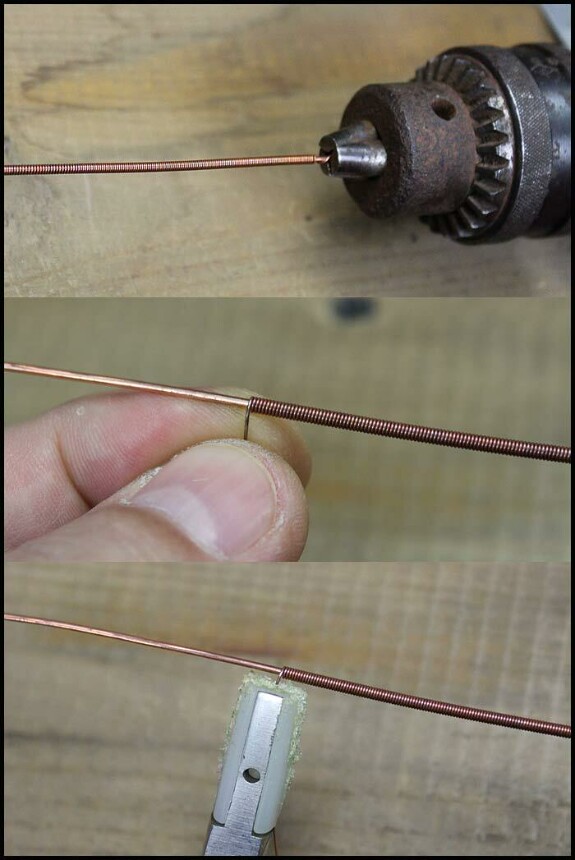
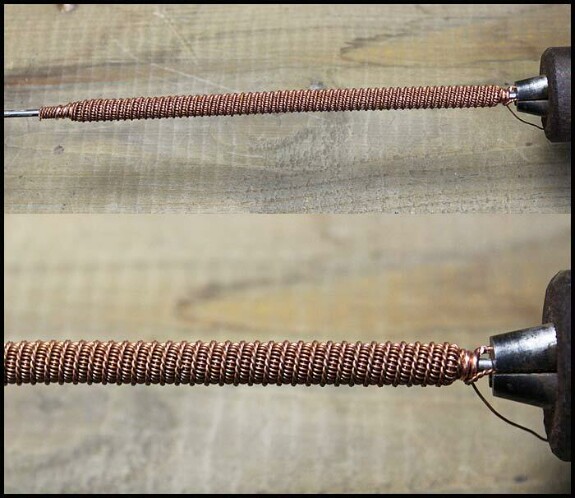
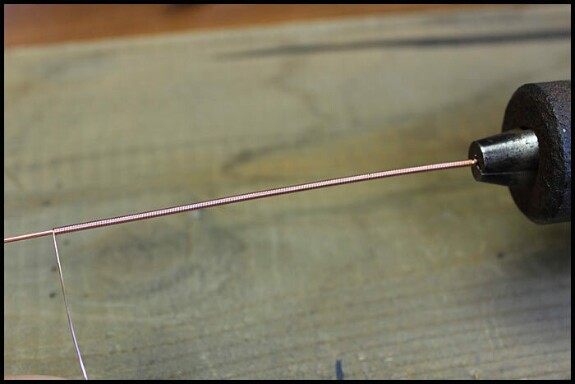
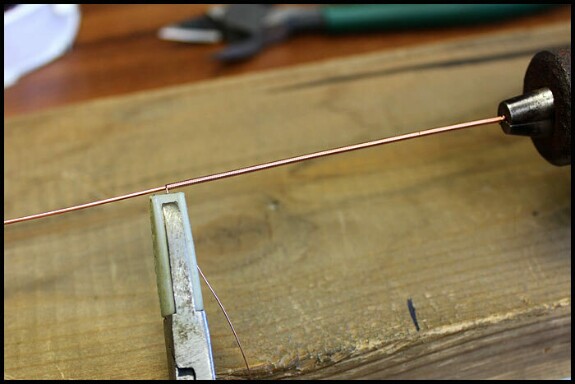
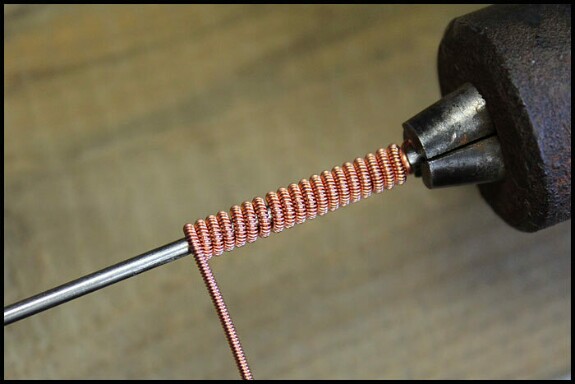
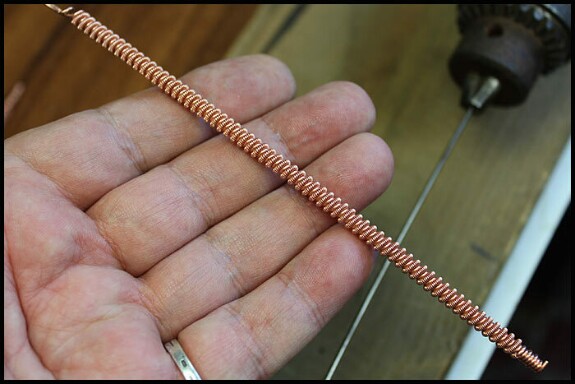
We need to fix a 1 mm thick copper wire between the drills. But don’t fix it too tight. The tension should be medium, not too strong. This 1 mm thick wire will be wrapped with a 0.4 mm thick wire (the thin one).
First, take the thin wire. Fix it in the chuck of the drill. Rotate the drill and wrap the thin wire around the thick one. You can hold the wire between your fingers or use pliers with silicone tips.
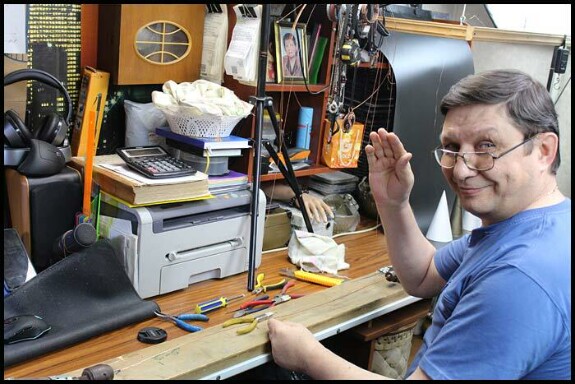
Look at the picture. That’s me, head over heels at work.
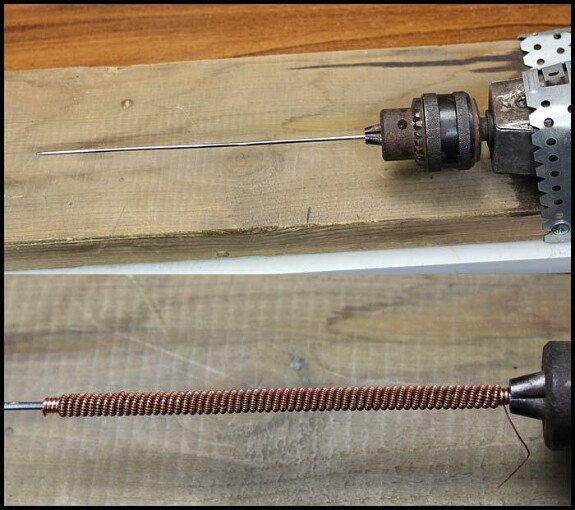
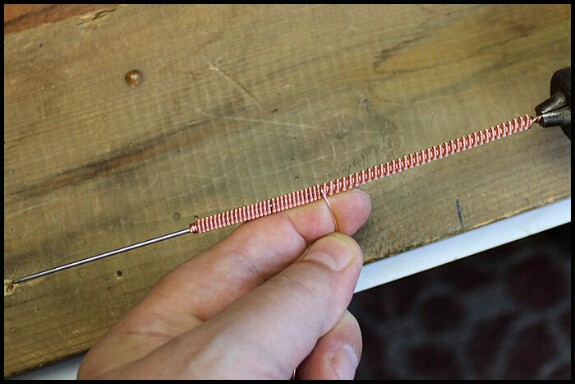
After we have wrapped the thin wire around the thick one, remove the blank. Insert a smooth knitting needle into the drill. It should be 2 mm thick. As for me, I used a 20 cm long knitting needle. We will wrap the wire we just made around this knitting needle.
In order to know how much wire you will need and how long the wire coils will be – you need to make at least one wire coil. I can’t tell you the exact values – you have to find them by trial and error. There are certain subtleties in this work that can only be known by practice.
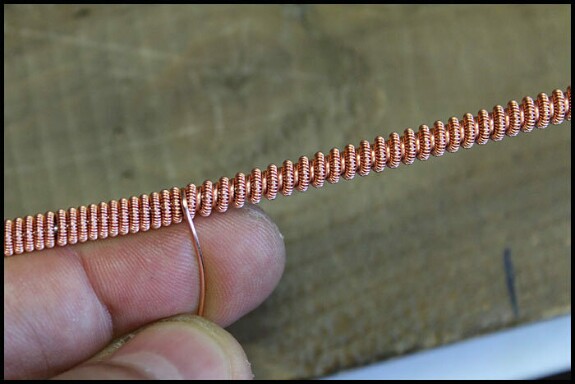
After that, take two pieces of wire. They should be about three meters long and 0.4 mm thick. We need to weave them together. You can use a hand drill or an electric screwdriver. As a result, we will have a piece of twisted wire. We will twist and place it in the gaps of our wire coil.
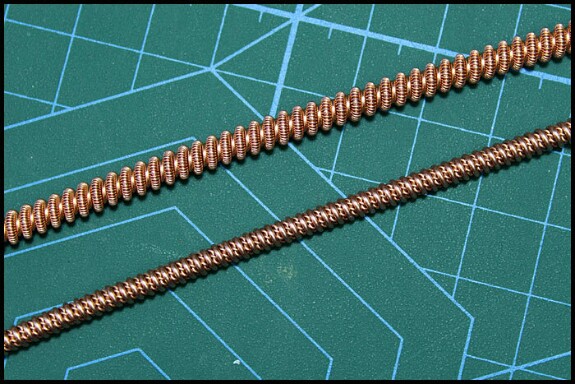
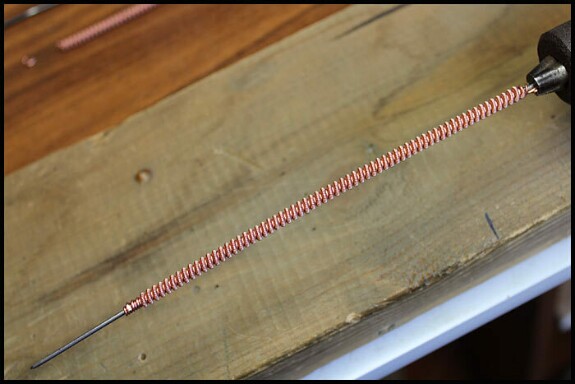
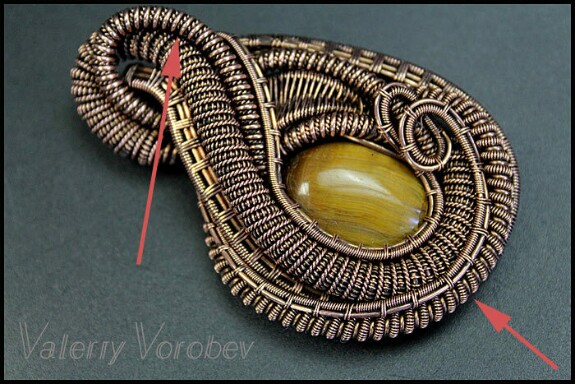
The wire coil is ready. Now we can use it to make jewelry. Over time, when you get some experience in making wire coils, you will know how much wire you need to make a coil of the right length.
Video tutorial
The second and third wire coils – lesson.
For the coil, we will use 0.8 mm thick soft copper wire (about 1 meter long) for the base. For the weaving, we will use a thin copper wire 0.3 mm thick.
In the chuck of the left-hand drill, I clamp a hook – I use it to attach 0.8 mm thick wire to it.
But, first of all, we need to clamp the wire in the chuck of the right drill.
But, first of all, we need to clamp the wire in the chuck of the right drill.
Twist and wrap 0.3 mm thick thin wire around the main wire. You can use pliers with silicone tips to hold the wire.
We should wrap almost all the wire. Then, release it. Clamp a 2 mm thick knitting needle in the drill. We should tightly wrap the wire we made a moment ago around this knitting needle.
Remove the almost finished coil from the knitting needle. Change the knitting needle to a thinner one, 1.6 mm thick. Put the coil on it. It is necessary to fix the end of the wire coil in the chuck.
Take 0.8 mm thick wire and wrap it around the coil with force – so that the wire enters the gaps of the wire coil.
It is done. We can use such wire coils to create jewelry from wire and stone. Right after that, it can be used for its intended purpose. For example, like this.
Video tutorial
Wire Wrapped tutorials - 20 PDF books for $40! - https://boosty.to/valeriy-vorobev/posts/72e9127a-1ff4-44f6-bcbb-cdee6b82afaf?share=post_link
After authorization and payment, return to the page and download all files with PDF books.