How to create an embroidery pattern yourself?
Sometimes subscribers contact me with questions about embroidery. And one of the questions was: how to create patterns for embroidery yourself? I tried to write it in this article. I hope this will be useful!
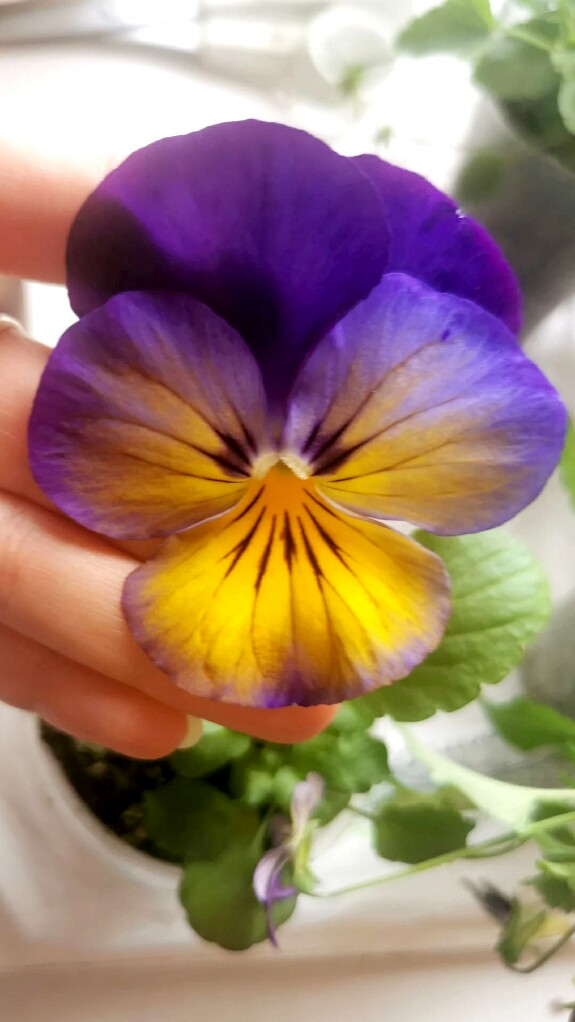
Well, let's start. To create your scheme, you need to determine what you would like to embroider? To do this, you can choose a photo or a drawing. Let's look at this using the example of a photo of my flower. First, you need to draw its main shape. If you can draw, draw a flower. If you don't know how to draw, reduce the photo to the size you need, put the sheet of paper on the monitor and trace the main shape of the flower petals. If you draw by yourself, the photo can just be an example of the color, you can draw the shape yourself.
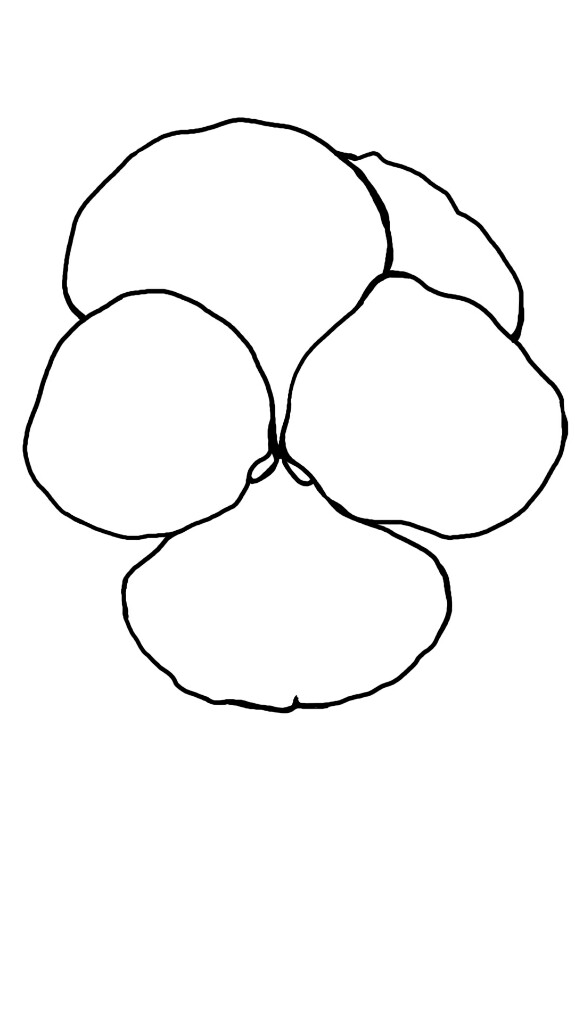
This is what the main form looks like. Only petals. The next step, we will apply color areas to this sketch.
About color. This is probably the most important thing - to choose the right color and make a division into shades. It is necessary to select the main colors and to them the darkest and the lightest. You can take many shades for a smoother transition. Amount of colors for smooth transitions depends on your desire and the size of the work. On small embroidery, a big amount of shades of the same color is not always required.
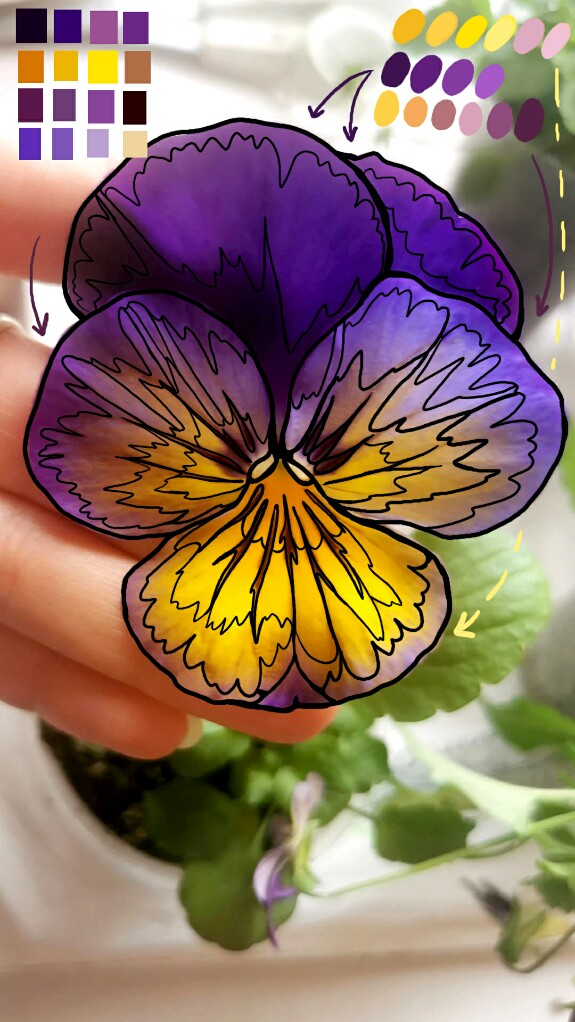
This flower has two dominant colors - purple and yellow. These are the colors that you need to choose shades for. Note that purple is not only the darkest and lightest shade, but also a pinker shade in some places.
If you look closely at the photo, you can divide the flower into color areas. I sort of divided it like this:
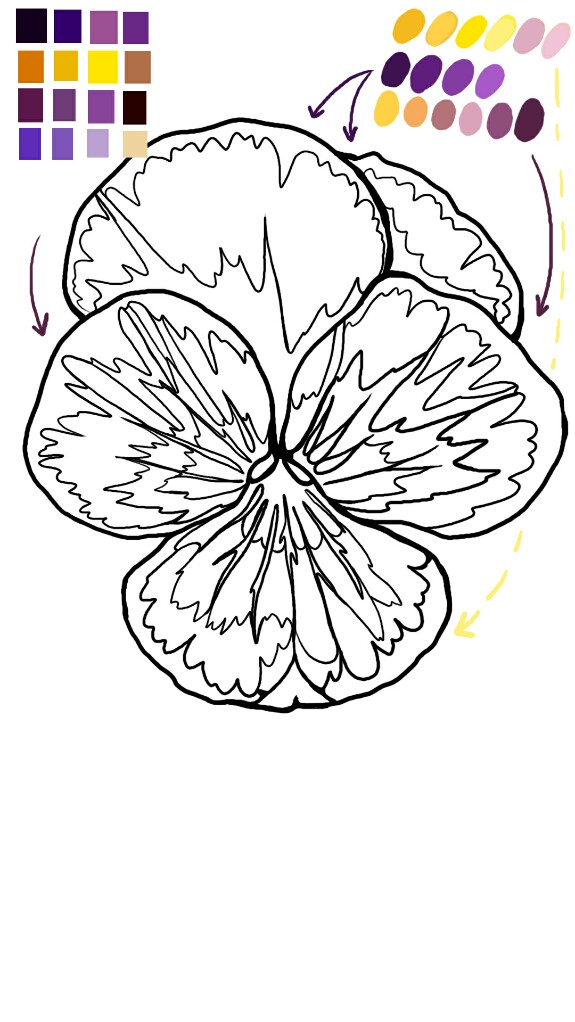
If you take the colors with a pipette directly from the photo, you get a gamma as in the squares on the left. This color scheme looks a bit out of harmony. Therefore, further on, I chose the colors myself (in the circles on the right). I deliberately simplified the color scheme. This can be done in more detail and detail. For example, repeating as in the photo, a lighter petal on the right, a darker one on the left, and so on.
These are approximately the colors that are now to be found in the palette of threads with which you plan to embroider.

Now the fun part is finding the right colors in the store!
Colored areas do not have to be geometric. After all, in fact, many different shades are mixed in a petal, and when you mix colors by adding stitches of another color, it looks more realistic.
Further, after you have found the threads suitable for your pattern, you can embroider according to this pattern and make your own changes if you had to add / change some details during work. After the work is ready, and changes have been made to the scheme, you can make a list of the threads that you need, by numbers. You can also make step-by-step recommendations on the progress of the work. And now, your own scheme is ready💛