
(Ru/Eng) Lily + Process Breakdown

⠀⠀⠀⠀⠀⠀⠀⠀⠀⠀⠀⠀⠀⠀⠀⠀⠀⠀⠀⠀⠀⠀⠀⠀⠀⠀⠀ ✧✧✧
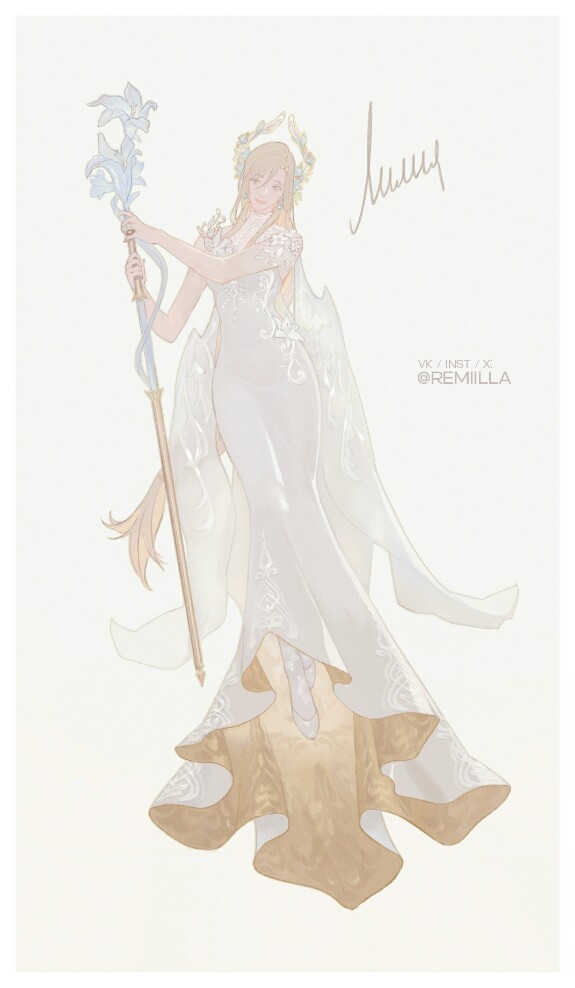
Основная идея - наконец-то нарисовать своего главного и любимого персонажа Лилию в полный рост. Я много раз переделывала ее образ, но теперь наконец смогла определиться. Делаю первый скетч.
The main goal was finally to draw my main and favorite character, Lily, in a full-body portrait. I've redesigned her look many times but have now finally settled on it. This is the first sketch.

Затем добавляю лайн, но исключительно, чтобы залить внутри него цвета. Этот лайн потом будет стерт или частично обрисован вторым лайном.
Next, I added line art, but solely
to make filling in the colors easier inside it. This initial line art
would later be erased or drawn over with a cleaner second pass.
to make filling in the colors easier inside it. This initial line art
would later be erased or drawn over with a cleaner second pass.

Заливаю цвета с помощью Pen Tool. Чтобы было легче исправлять ошибки, каждый цвет хранится на отдельном слое (волосы, кожа, платье и т.д.).
I filled in the base colors using the Pen Tool. To make edits easier, each color group is on its own layer (hair, skin, dress, etc.).
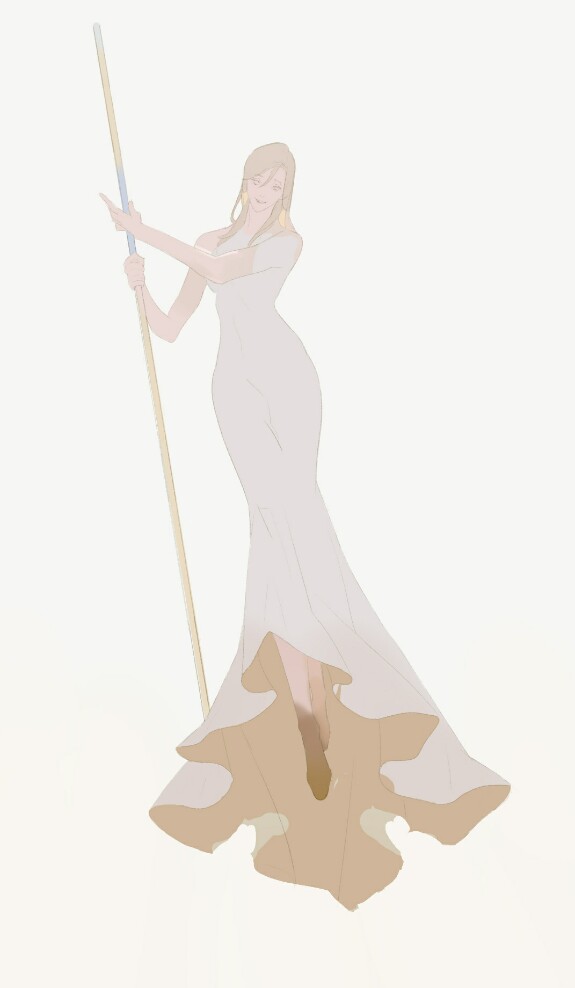
Начинаю постепенно скрывать лайн и добавлять объема. Также очень грубо намечаю форму тканей сзади. Поскольку Лилия - Посланница, мне хотелось, чтобы ткань напоминала и крылья, и лепестки лилии.
I started gradually hiding the rough line art and adding basic volume. I also roughly sketched in the shape of the fabric at the back. Since Lily is a Messenger, I wanted the fabric to resemble both wings and lily petals.
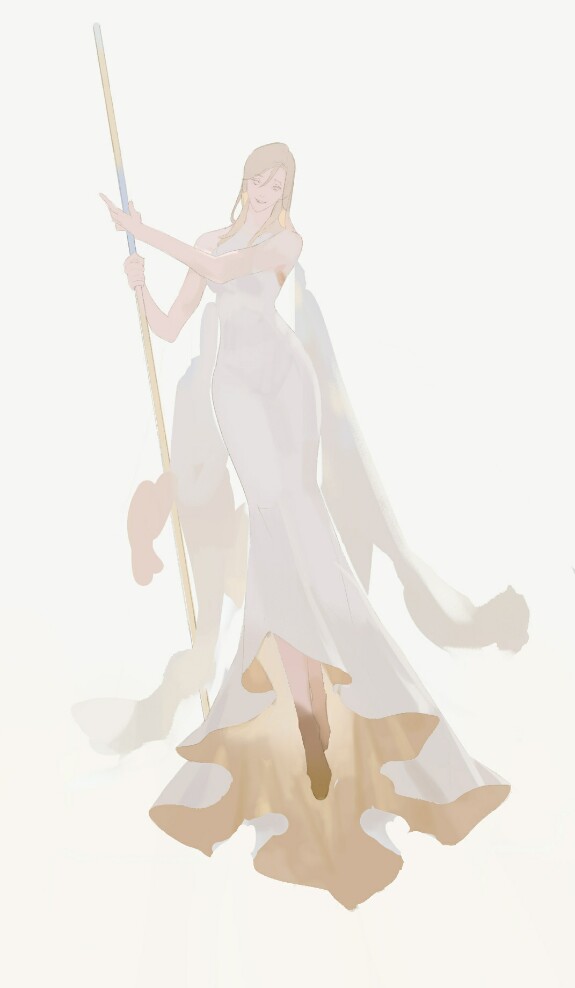
Теперь на самом верхнем слое рисую новый лайн и одновременно покрас внутри его границ. Старые слои с отдельными цветами уже не нужны. Исправлять ошибки на одном слое поверх всего для меня значительно проще, чем искать ошибки в нижних слоях и исправлять там.
Now, on a brand new top layer, I drew clean line art and simultaneously painted within its borders. The old separate color-blocking layers were no longer needed. For me, fixing mistakes on a single top layer over everything is significantly easier than hunting for errors in the lower layers.
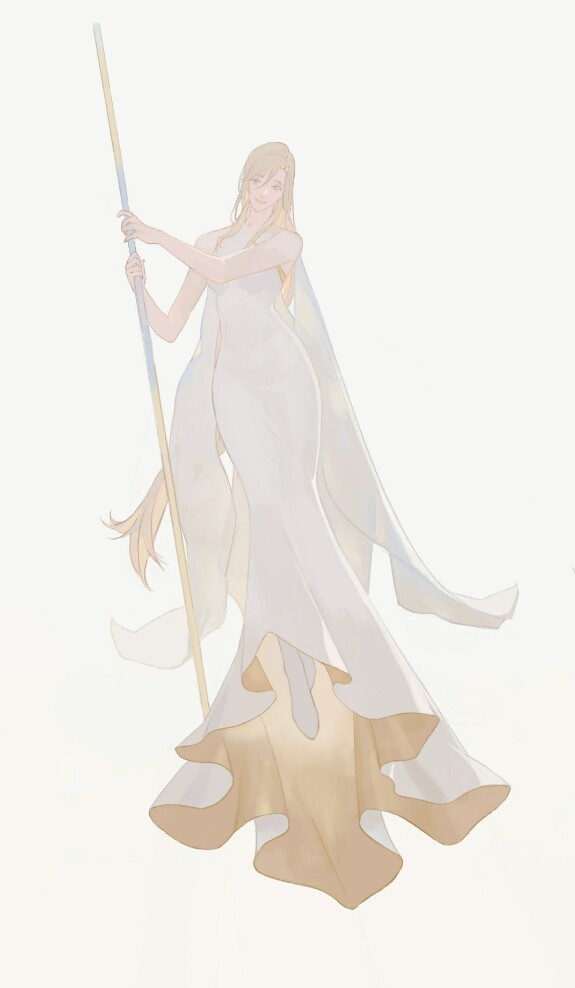
Добавляю больше деталей. В этом мне помогает Pinterest. Т.к. Лилия из Северной страны, то и узоры сделала соответствующие, напоминающие иней на окнах, снежинки и лед. А также немного цветочный мотив из цветков лилий.
I added more details with help from Pinterest. Since Lily is from the Northern Country, I created patterns reminiscent of frost on windows, snowflakes, ice, and also a floral lily motif.

Теперь работаю над посохом. Наметила форму, а только потом - лайн.
I blocked in the shape of the staff first, and only then drew the line art for it.

Добавила больше деталей - нимб, верхушку посоха и узоры на платье. Последние сделала на отдельном слое с помощью вертикальной симметрии. А затем растягивала по складкам платья через Ctrl+T — ПКМ — Warp.
Дополнительно добавляю на белые узоры тень в Blending Options слоя, чтобы они имели небольшой объем.
I added the final details: the halo, the staff's finial, and the patterns on her dress. I created the last ones on a separate layer using vertical symmetry. Then, I stretched and warped them to fit the dress's folds using Ctrl+T > Right-Click > Warp.
To give the white patterns slight volume, I added a subtle shadow via the layer's Blending Options.

В самом конце выделяю всю фигуру, заливаю слой белым цветом, ставлю режим слоя на Multiply и добавляю этому слою обводку с такими параметрами:
At the very end, I selected the entire figure, filled a new layer with white, set the layer mode to Multiply, and added a stroke to this layer with these settings:
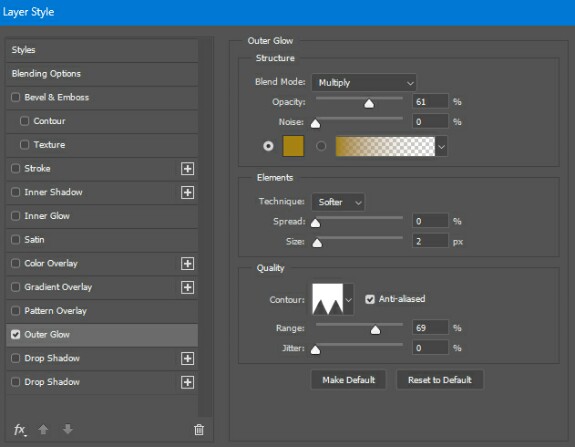
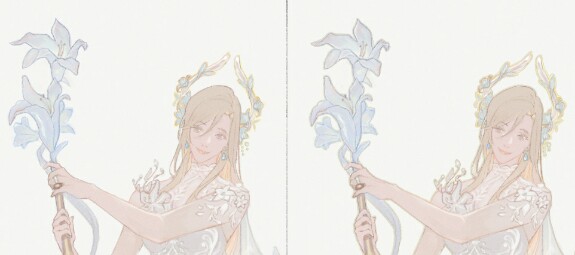
До и после обводки / Before and after adding the outline.
Результат / The result:
Gif Process:
gif
Lily-standing.gif715.93 Kb
process